According to a fundamental viewpoint, lights allow one to transmit light, simplify it, and track it down without clarity. While they function admirably in this capacity, they can, in like manner, fill various necessities. They can, in like manner, be extravagant and stylish through their effort, and one of the fascinating kinds of lights is known as a paper light. These lightweight lights began in China and are a magnificent sight. Sorting out some way to draw a light so you can rehash this grandness can undoubtedly be a horseplay and repaying experience. We will sort out some way to do precisely that in this little aide on the most capable technique to draw in light in just 6 phases!
Visit the ducks coloring pages.
Stage 1 – light drawing
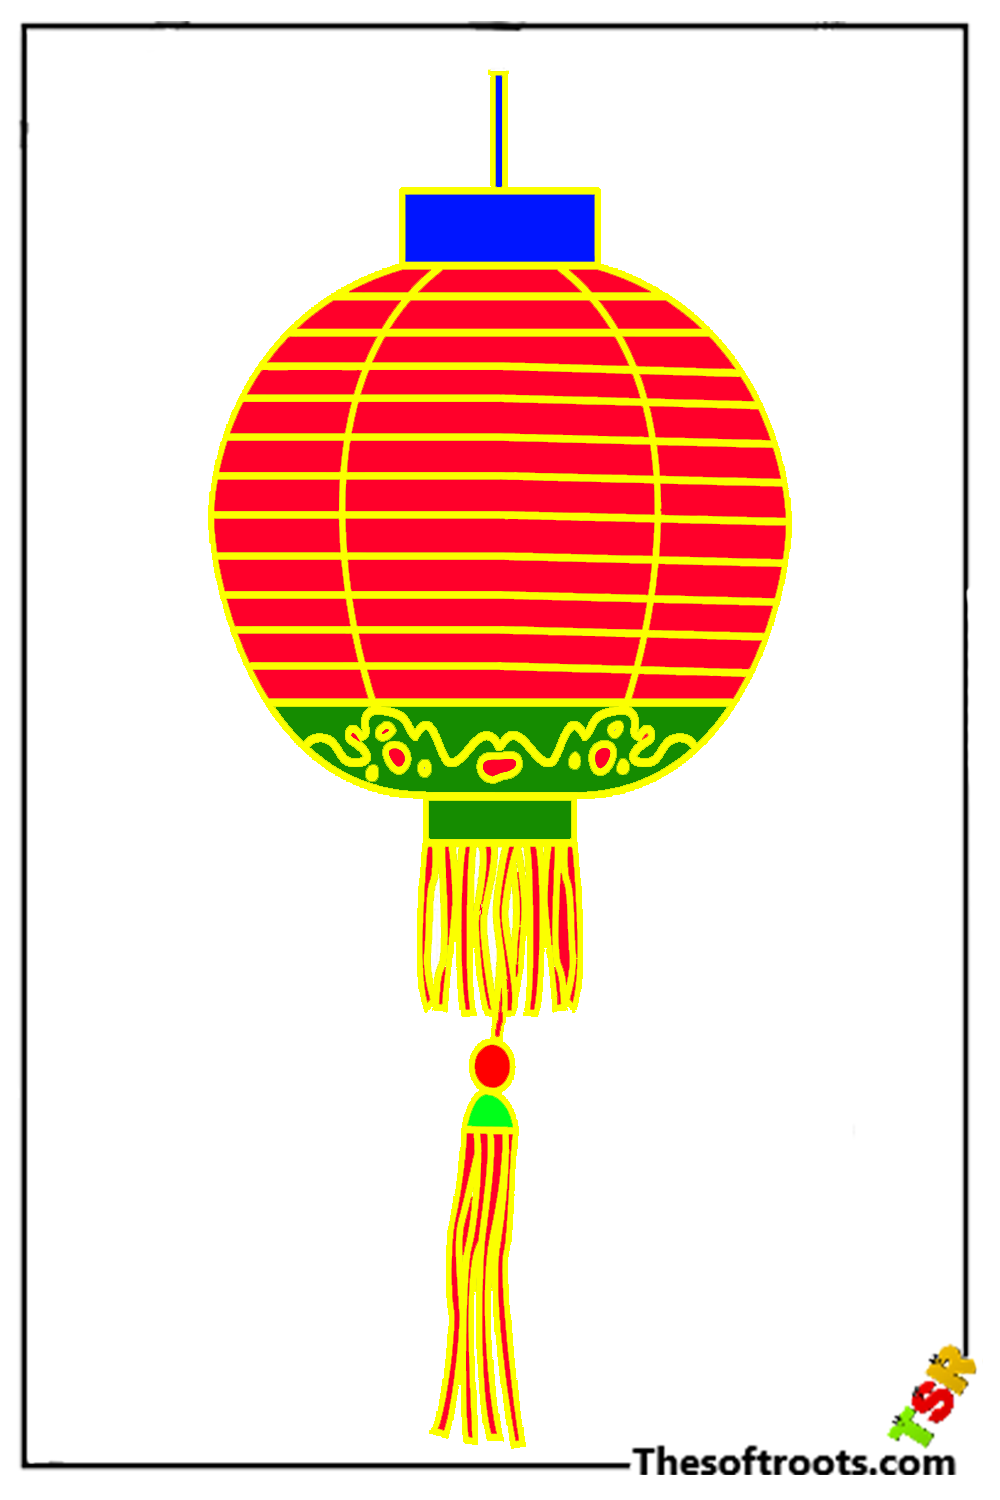
The paper light that we will draw in this helper on the most capable strategy to draw a light will be exceptionally round. These lights will typically wait tangibly, projecting a stunning fragile sparkle encompassing them. We will draw a changed shape to get everything moving with this light. You could use a drawing compass and a light pencil to draw a circle to simplify this. Using your drawing pen, you can then give this circle a level top and, a while later, draw over the rest of the circle.
This will help you end up with a shape that is, by all accounts, the one in our reference picture. Then, at that point, we will be ready to forge ahead toward the accompanying stage!
Stage 2 – Next, draw a couple of nuances for the light
You have the essential outline of the light drawn now. So we can add delicate nuances to this second piece of your light drawing. You can draw a slight, slim rectangular shape to the light’s top and lower part to start doing this. We will add an extra nuance to the light when you draw these rectangular shapes. You can do this by characterizing a couple of changed limits with sharp places to cause a couple of shapes to appear as blooming petals. These will go under the square shape on top or more than the one at the base. As shown in our reference picture, the ones on the base will be more humble than the ones on top.
Stage 3 – Draw the string and designs for the light
In this helper, we referred to the most capable technique to draw a light that these paper lights, as often as possible, will wait unmistakably from a string or a rope. In this following stage, we will draw the string hanging from close by a couple of additional parts. Attracting the string should be essential, as you ought to characterize two straight limits close to one another on top of the light.
When you have drawn that string, we will then draw a couple of little tufts swinging from the light. These can be defined for specific wavy boundaries to show them hanging under the light. Once these have all been drawn, we will be ready for the next stage.
Stage 4 – By and by, draw a couple of extra nuances for the light
This step of your light drawing will see you add more detail to the light. These lights habitually cross over out, and we will draw the wrinkle lines now. To do this, you can characterize a couple of twisted limits across the body of the light.
These will be twisted to show the state of the light, and the reference picture will let you know the most effective way to wind these. Leave a space in the center, as we will add a more significant improvement to that district in the resulting stage. Before you progress forward, you can, in like manner, draw in a beaded tuft to join the rest of the beautification that you pulled in the past step.
Stage 5 – Add the last nuances to your light drawing
We left a space in the point of convergence of the drawing in the last step of this helper on the most capable technique to draw light, and we will clean it off as of now. This light is in the style of a model Chinese paper light, so we will finish by adding a Chinese substance to the front of the light. Here you will have to copy the reference picture we have given eagerly. When this detail has been added, you are ready to proceed! You could add your insight preceding progressing forward. These lights are generally hung in exceptional sums, so you could draw in additional lights for the establishment to go with this one.
How should you finish this picture?
Stage 6 – Finish your light drawing with some tone.
This is the last step of this light drawing, and we will finish by adding a couple of great tones! Remaining with the subject, we used a couple of brilliant reds and yellows to revive this light. This makes a beautiful warm picture. If you like what this resembles, you could replicate the tones for your picture. There are so many uncommon assortments you could utilize as well, so make sure to use anything different assortments that you could like! If you go for other outstanding assortments, you could use mediums like acrylic paints and shaded markers to revive them.
Also Read talk us